About the Web Portal

Understanding the web portal layout and initial customization.
![]() The web dashboard is recommended for user with higher level rights for advance setup/configurations or monitoring.
The web dashboard is recommended for user with higher level rights for advance setup/configurations or monitoring.
In this manual, we will take you through step by step guide in customizing your web portal.
First, let’s get use of all the menu and icons.
![]()
A click on the user icon shows the “Manage your account” section on the Login Panel, which consists of all the shortcuts. From here a user can also logout from the application.
 Besides the User section on the user icon/login panel is the Notifications section, where a user can view all the Notifications and Announcements.
.png?width=114&height=173&name=dashboard%20(1).png)
Next is the Dashboard, which is the graphical representation of all the activities happening in the account. By clicking on Dashboard, a user will land on the dashboard screen.
![]()
Below the Dashboard is Tracking on the login panel. Tracking stands for the live tracking screen, which is the screen from where the user can view the live activities of their objects.
On the login panel, below Tracking is Reports. Reports are a textual view of all the data that is received from the device.
Next is Chart, which lies below Reports on the login panel. Charts are a graphical representation of the reports.
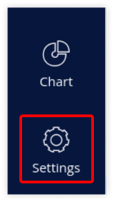
The last on the login panel is the Settings option, which lies below the Chart. Settings is basically the configuration module of the platform. All the configurations can be done from the settings.
Visit to know more about
- How to upload logo
- Manage your account from the login icon
- Notifications section
- Dashboard
- Tracking
- Reports
- Chart
- Settings