Object tab on Live Tracking Screen
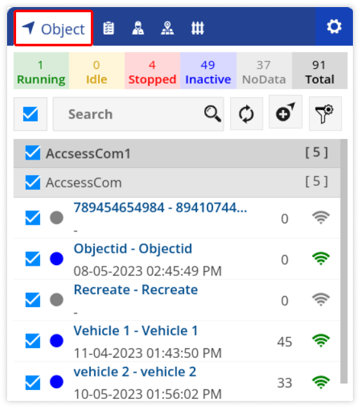
The listing window on the left side of the screen displays all the objects and their selected details in one place.
To view the object tab, go to Listing Panel > Object tab .

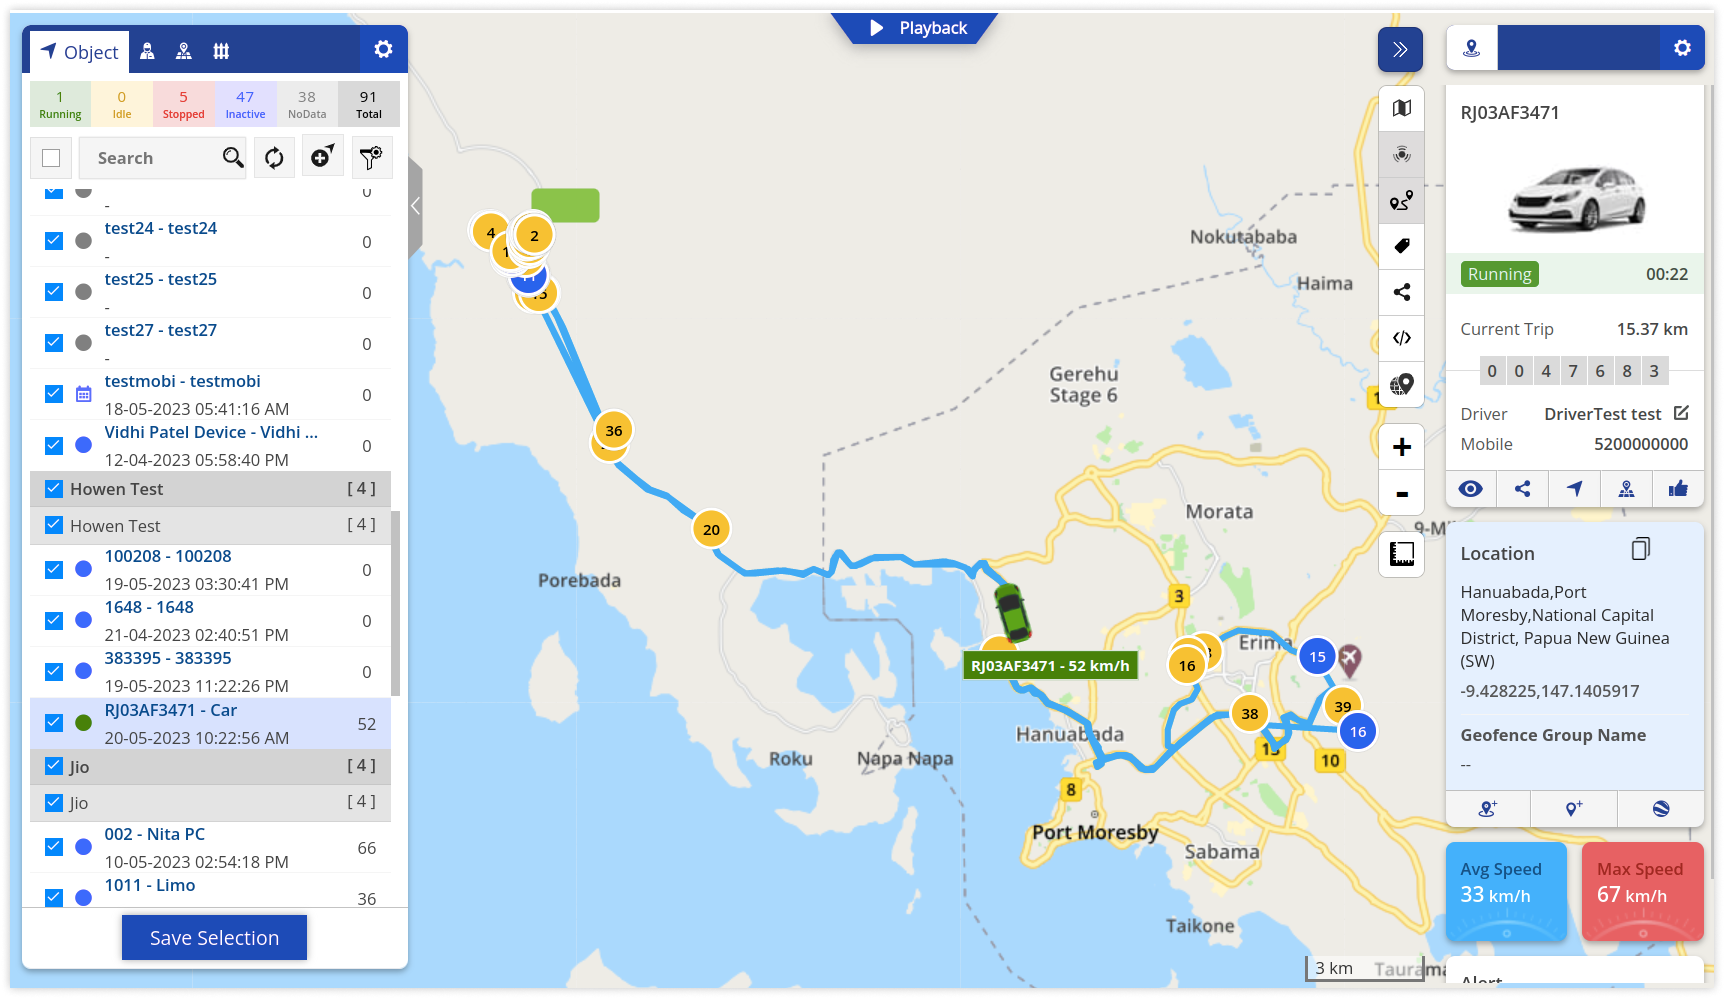
The listing window on the left side of the screen displays all the objects and their selected details in one place.
To view the object tab, go to Listing Panel > Object tab .
It consists of the following features and details:
Object Status
Object status is displayed in a color coded form on the vehicle status bar. Below given is the image of the object status bar which shows the number of vehicles in each category:

To narrow down the results of the object list, users can click on the status to view vehicles from that particular status.
Search/Add Object
From here a user can perform actions on the objects.

Below given are the actions that can be performed:
- Select/Unselect all objects: By clicking on the checkbox, a user can select or unselect all the vehicles at once.
- Search Object: Using search box, user can easily search the specific objects.
- Add Object: By clicking on add object button, user can add objects directly from the Live Tracking Screen.
To learn how to add an object, click here.
- Filter: User can filter objects on the basis of Company-Branch, Object Group, Reminder or Type using the Filter option.
Object Information
The detailed object information can be viewed here in one place.
When the user selects a particular vehicle, the screen that is displayed is as shown below:

Below given is the type of information that can be selected and viewed in the object information list. These parameters are based on the user’s selection from the object information list.

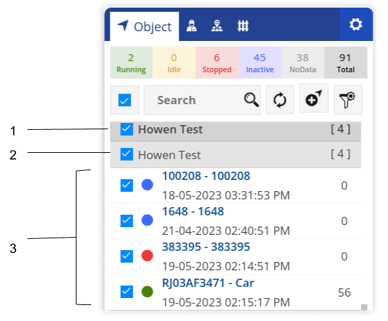
- Company Name: The name of the company under which the object falls is displayed.
- Branch Name: The branch under which the object falls is displayed.
- Object List: The list of all the objects and their details are displayed.
The object list displays the below given details:
%201-png.png?width=407&height=130&name=Untitled%20document%20(6)%201-png.png)
- Object Status + Reminder
Below given are the color codes which denote the status of that object:
Running
Vehicles with their Ignition ON and are in a moving state.
Idle
Vehicles with their Ignition ON but are not in a moving state for specified period of time.
Stopped
Vehicles with their Ignition OFF.
Inactive
Vehicles that have not sent any data to the server for specified period of time.
No Data
Vehicles that have never gone Live.%201.png?width=26&height=26&name=calendar%20(9)%201.png)
Object Status + Reminder
Any unacknowledged reminders for that day will be displayed with the calendar icon.
The color of the icon will indicate the status of the object. - Object Number: The number-plate registration or the dedicated number of the object will be displayed.
- Object Name: The dedicated name of the object will be displayed.
- Last Data Updated: The date and time when the data of the object was last updated will be displayed.
- Speed: This denotes the speed of the vehicle.
- Mode: The mode of the object is displayed, if it is good to go or had a breakdown or met with an accident.
- TimeLine Chart: By clicking on the timeline chart icon, the detailed timeline chart of the object is displayed for the selected date.
- No. of passenger seats: The number of passenger seats in that object are displayed.
- Max. Load Capacity: The maximum load capacity of the object is displayed.
The following are the digital port parameters. They will be displayed in green when ON, red when OFF and grey when not connected based on their status.

GPS

Health Monitor

Driver

Air Conditioner

Ignition

Power

Seat Belt

SOS

Buzzer

Vibration

External Low Battery
Remaining all the parameters depend on the data received from the GPS device.
Users can select the object details that they want to be displayed in object listing.
Go to Listing Panel > Object tab >  to customise the information users want to view in the object list.

Once you click on the settings button, a window opens on the right side of the screen as below:

Select the preferred details to be shown in the object list, then click on save.
When the user clicks on the object, the path taken by that particular object on that day is displayed on the screen.
Tooltip
When the user clicks on a particular object from the object list, a tooltip appears on the right side of the screen, which displays widgets of various types as selected by the user on the basis of requirements.
The tooltip is as shown in the below image:
.png?width=161&height=540&name=ol%20(1).png)
To know more about tooltip, click here.
Playback
A playback option appears in the top center of the screen, which displays the playback of that object in the selected time.
Playback is as shown in the below image:
.png?width=688&height=354&name=ol1%20(1).png)
